

How to Replace Raymond Mill Grinding Parts
Grinding parts are the working heart of every Raymond mill. When the grinding roller and grinding ring lose their profile, capacity falls, fineness drifts, power consumption climbs, and your whole powder line starts losing money. This guide from Baichy Heavy Industry — a manufacturer of crushing, ore grinding and mineral processing equipment based in Jiaozuo, Henan — shows exactly how to replace Raymond mill grinding parts safely, correctly and with minimum downtime.
What Are the Grinding Parts of a Raymond Mill?
A Raymond mill grinds by compression: the pendulum-mounted roller swings outward under centrifugal force and crushes material against the stationary ring. Every part that forms or feeds that compression zone is a wear part.
Grinding rollers and grinding rings
• Grinding roller (roller sleeve) — the rotating part hung on the plum-blossom frame; it both revolves around the vertical shaft and rotates on its own axis.
• Grinding ring (bull ring) — the stationary, tapered ring seated in the mill base that defines the grinding track.
Both are consumables. In practice, "replacing the grinding parts of a Raymond mill" means fitting a matched roller-and-ring set.
Shovel blades and roller-assembly hardware
• Shovel blades (scraper knives) lift material from the mill floor into the roller–ring gap. Worn blades starve the mill and can waste 10–20% of installed power.
• Roller assembly parts — bearings, seals, shaft sleeves, spring or hydraulic pressure arms, hanger pins, plus liner and air-duct wear plates inspected at the same shutdown.
When Should You Replace Raymond Mill Grinding Parts?
• Never wait for the mill to stop. Trigger the job on measurable wear, and plan around throughput, not calendar dates.
• Capacity drop of 15–25% at unchanged feed rate, classifier speed and fan opening.
• Fineness drift — the −325 mesh fraction falls even after raising analyzer speed.
• Rising specific power use (kWh/t) on the main motor ammeter.
• Abnormal vibration or metallic knocking from the grinding chamber.
• Ring groove deeper than 15–20 mm, or roller wear beyond 50–60% of original wall thickness.
• Spalling over 20% of the track, or radial cracks found by dye-penetrant or ultrasonic testing.
Log three numbers at every inspection: running hours, total tonnage passed, and groove depth measured at the same reference point. If a ring lasts 3,500 hours at 8 t/h, a 1,000-ton change in production plan moves your replacement date more than the calendar does.
Baichy field rule: never fit new rollers onto a heavily worn ring. New rollers seat into the old grooves and can lose 60–70% of their life within 500–800 hours. If the ring is within roughly 2,000 working hours of its own limit, replace both together.
Raymond Mill Wear Part Specifications by Model
Ordering the wrong roller or ring is the number one cause of a failed Raymond mill repair. Always quote model + roller size + ring size when buying Raymond mill spare parts.
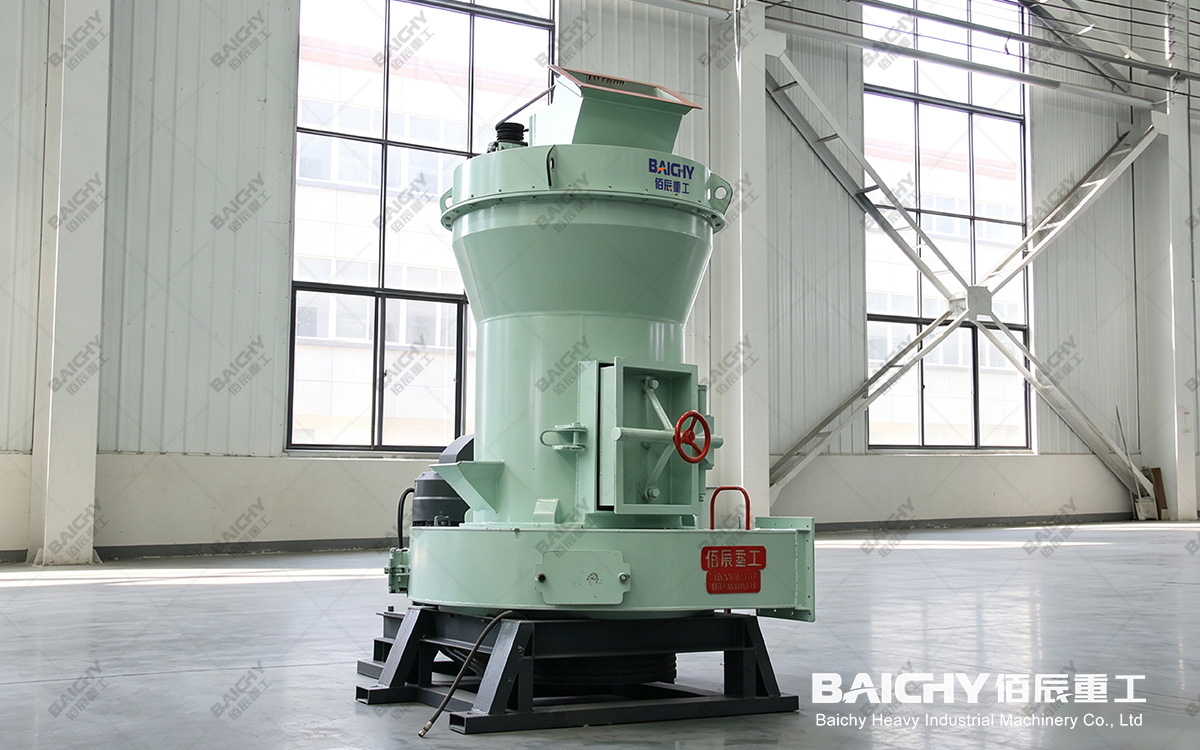
Raymond Grinding Mill
R-Series pendulum Raymond mill — grinding part dimensions
| Model | Rollers (pcs) | Roller Size D×H (mm) | Grinding Ring D×H (mm) | Max Feed (mm) | Output Size (mm) | Output (t/shift) | Main Power (kW) |
|---|---|---|---|---|---|---|---|
| 3R1510 | 3 | 150 × 100 | 570 × 100 | ≤15 | 0.125–0.044 | 0.8–10 | 7.5 |
| 3R2115 | 3 | 210 × 150 | 630 × 150 | ≤15 | 0.125–0.044 | 1–12 | 15 |
| 3R2615 | 3 | 260 × 150 | 780 × 150 | ≤20 | 0.125–0.044 | 1.5–20 | 18.5 |
| 3R2715 | 3 | 270 × 150 | 830 × 150 | ≤20 | 0.125–0.044 | 2–28 | 22 |
| 3R3015 | 3 | 300 × 150 | 875 × 150 | ≤25 | 0.125–0.044 | 2–35 | 30 |
| 4R3016 | 4 | 300 × 160 | 890 × 160 | ≤25 | 0.125–0.044 | 3–36 | 30 |
| 4R3216 | 4 | 320 × 160 | 970 × 160 | ≤25 | 0.125–0.044 | 4–45 | 37 |
| 5R4119 | 5 | 410 × 190 | 1270 × 190 | ≤30 | 0.125–0.044 | 8–60 | 75 |
Capacity varies with material hardness, moisture and feed size.
MTW Series European-type Raymond mill — grinding part dimensions
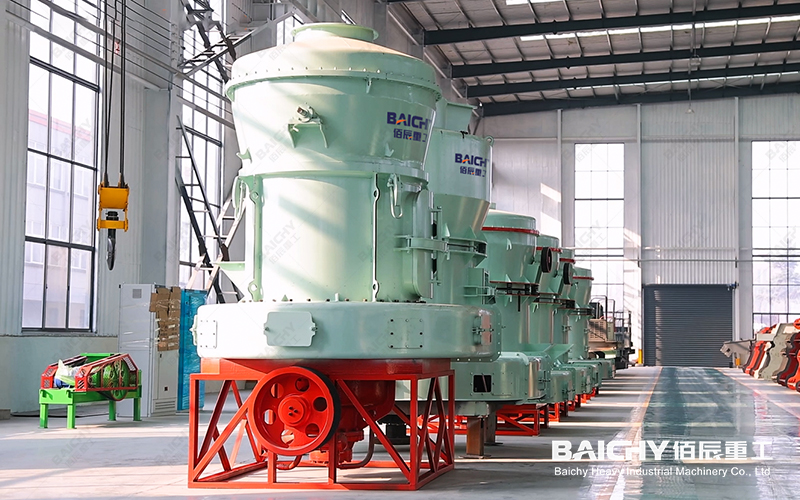
MTW Grinidng Mill
| Model | Roller Size D×H (mm) | Grinding Ring D×H (mm) | Main Shaft Speed (r/min) | Max Feed (mm) | Output Size (mm) | Capacity (t/h) | Power (kW) |
|---|---|---|---|---|---|---|---|
| MTW110 | 360 × 210 | 1100 × 210 | 120 | ≤30 | 0.038–1.6 | 3–10 | 75 |
| MTW138 | 460 × 260 | 1380 × 260 | 96 | ≤35 | 0.038–1.6 | 6–20 | 90 |
| MTW175 | 520 × 300 | 1750 × 300 | 75 | ≤40 | 0.038–1.6 | 10–35 | 185 |
| MTW215 | 640 × 340 | 2150 × 340 | 65 | ≤50 | 0.038–1.6 | 20–50 | 280 |
Replacement decision matrix for Raymond mill wear parts
| Indicator | Monitor | Repair (hardfacing) | Replace |
|---|---|---|---|
| Ring groove depth | <8 mm | 8–15 mm | >15–20 mm |
| Remaining ring thickness | >70% | 55–70% | <50–60% |
| Roller surface | Light polishing | Local pitting | Subsurface cracking / distortion |
| Spalling on track | <5% of area | 5–20% | >20% |
| Vibration trend | Stable | Slight rise | Rising + audible knock |
Preparation: Tools, Spare Parts and Lockout/Tagout
A Raymond mill ring change is heavy maintenance, not a bolt-off/bolt-on job. Budget 8–16 hours for a 3R/4R machine and 16–30 hours for a 5R4119 or MTW175+ unit, crane access included.
Tools: overhead crane or forklift (1.5–2 t for small mills, 5 t+ for large), hydraulic jacks or puller, lifting lugs and slings, torque wrench, brass drift, copper hammer, oxy-acetylene cutting set, dial indicator, feeler gauge, profile template, ultrasonic gauge, high-temperature lithium grease, new seals and locking plates.
Safety: apply LOTO on the main motor, classifier and blower; hang a "Do Not Start" tag; confirm the grinding chamber is depressurised and cooled before opening inspection doors; use helmet, gloves, goggles and dust mask. Never strike a roller directly with a steel hammer or drag a ring across the chamber floor.
How to Replace Raymond Mill Grinding Parts: 8 Steps
The sequence below suits Baichy R-series pendulum machines and, with minor differences, YGM high-pressure mills and MTW trapezium mills. Confirm torque values against your manual.
Step 1 — Isolate and open the grinding chamber
Stop feeder, blower, classifier and main motor in that order. Isolate power, remove inspection doors and the upper housing, and clear residual material from the mill base.
Step 2 — Remove the roller assemblies
Unbolt the roller-hanger covers, release the pressure spring or hydraulic arm, and free each roller shaft. Slide a wooden board under the roller, pry it up gently and lift it out through the front or rear door. Record each roller's position, shim count and orientation.
Step 3 — Take out the worn grinding ring
Remove the ring retaining blocks (usually three or four around the circumference). The ring and base are a taper fit — roughly 1:10 for 4R and smaller machines, about 1:8 for 1280-type and larger 5R/MTW models — so they seize tightly over time. Two accepted methods:
Jack method: place hydraulic jacks symmetrically under the bottom circumference, referencing the shaft centre, and push the ring out evenly. Use it when you want to keep the old ring for measurement.
Cutting method: cut a scrap ring into two or three sections with oxy-acetylene and lift them out. Faster, and safer for the machine, because uneven jacking can score the tapered seat. Never cut into the base.
Step 4 — Clean and inspect the ring seat
Remove burrs, sealing compound and rust. Check the seat for erosion, scoring or cracks, and inspect the main shaft, bearings, seals and plum-blossom frame at the same time. A damaged seat concentrates stress and will ruin a new ring within weeks.
Step 5 — Seat the new grinding ring
Lower the new ring from above, align it to the centring marks, and seat it with even, symmetrical strikes using a copper hammer or wooden buffer block. Fit and lock the retaining blocks. The ring must not move axially or circumferentially in service — any movement shows up instantly as vibration and unstable output.
Step 6 — Fit new rollers and set clearance
Install new roller sleeves with new bearings, seals and high-temperature grease, in their recorded positions. Torque fasteners in a diagonal, staged sequence. Set roller–ring clearance (commonly 0.5–2 mm on R-series Raymond mills) and check it with a feeler gauge at several points. Fit new shovel blades now and check blade-to-base clearance.
Step 7 — Reassemble and break in
Refit the housing, restore lubrication and air systems, and run the mill empty for 30 minutes. Watch for noise, vibration and bearing temperature. Then feed at 30–50% of rated load for 2–4 hours, checking current, vibration and ring temperature at 1 hour and again at 8 hours.
Step 8 — Re-tune the classifier
New parts change grinding dynamics. Re-adjust analyzer speed and fan air volume, then verify particle-size distribution against your product specification.
Choosing Materials for Raymond Mill Wear Parts
Material choice matters more than price per kilogram:
• High-manganese steel (Mn13, water-toughened) — Baichy's standard for rings and rollers: high tensile strength, toughness, plasticity and non-magnetic behaviour, with strong work-hardening under impact.
• High-chromium cast iron (15–28% Cr) — best abrasion resistance for quartz, feldspar and hard ore; brittle under large lumps.
• Ni-Hard cast iron — lower cost, good abrasion resistance with better toughness; common for coal and soft minerals.
• Bimetal composite / hardfacing overlay (58–65 HRC) — restores 80–90% of original life at 30–50% of replacement cost when the base metal is sound; practical for rollers, hard on rings.
• Match material to the wear mechanism: abrasive ores need hardness, impact-heavy feed needs toughness. Compare Raymond mill wear parts on cost per ton — a ring that is cheaper but lasts half as long doubles your labour, crane and downtime cost.
Five Mistakes That Shorten Raymond Mill Grinding Part Life
Replacing rollers only and leaving a grooved ring in service.
• Oversized feed — respect the model limit (≤15 mm on 3R1510/3R2115, ≤30 mm on 5R4119, ≤50 mm on MTW215).
• Wet or sticky feed above 6% moisture without pre-drying, causing packing and slip.
• Skipping lubrication of roller bearings and shaft sleeves, which fails bearings before the wear parts.
• Ignoring shovel blades and clearance checks during the same shutdown.
Why Source Grinding Parts from Baichy Heavy Industry
Baichy Heavy Industry has built crushing, grinding and beneficiation equipment since 2003. Our Jiaozuo, Henan plant covers 200,000 m² with over 500 staff, producing 1,000 crusher sets and 10,000 tons of wear parts annually. Every replacement roller and ring for a Raymond mill is cast and machined to the original drawing, so profile, hardness depth and bolt pattern match your machine exactly. We provide dimensional reports and material certificates, hold standard R-series, YGM and MTW wear parts in stock for 7–10 day delivery, and offer on-site installation guidance and operator training.
Conclusion
Replacing Raymond mill grinding parts is precision work, not a consumable swap. Measure wear on tonnage, replace roller and ring as a matched set, respect the taper fit and torque sequence, and break the mill in under reduced load. Do that and you protect the base, stabilise fineness and keep cost per ton predictable.
FAQ: Replacing Raymond Mill Grinding Parts
1. How often should Raymond mill grinding rollers and rings be replaced?
There is no fixed interval. Judge by throughput and measurement: expect 2,000–4,000 operating hours from standard high-manganese parts, and up to 8,000 hours with optimised alloys on soft feed. Track tonnage passed rather than calendar months.
2. Can I replace only the grinding roller and keep the old ring?
Only if the groove is under about 8 mm and the track is free of spalling. Otherwise the new roller seats into the old groove and wears prematurely. Change both when the ring is within roughly 2,000 hours of its own replacement limit.
3. How do I remove a seized grinding ring without damaging the mill base?
Cut the scrap ring into two or three sections with oxy-acetylene and lift them out, or push it up along the taper with hydraulic jacks placed symmetrically underneath (1:10 taper for 4R and smaller, about 1:8 for 1280-type and larger models). Never cut or gouge the tapered seat.
4. What clearance should I set between the roller and the ring?
On most R-series Raymond mills the operating clearance is about 0.5–2 mm, checked with a feeler gauge at several points around the circumference. Confirm the exact figure in your model's manual and torque all fasteners in a diagonal, staged sequence.
5. Does Baichy supply wear parts for non-Baichy Raymond mills?
Yes. Send roller and ring dimensions, bolt pattern, a drawing or nameplate photos, and we will produce matched castings in Mn13, high-chromium iron or Ni-Hard, with material certification and a dimensional report.