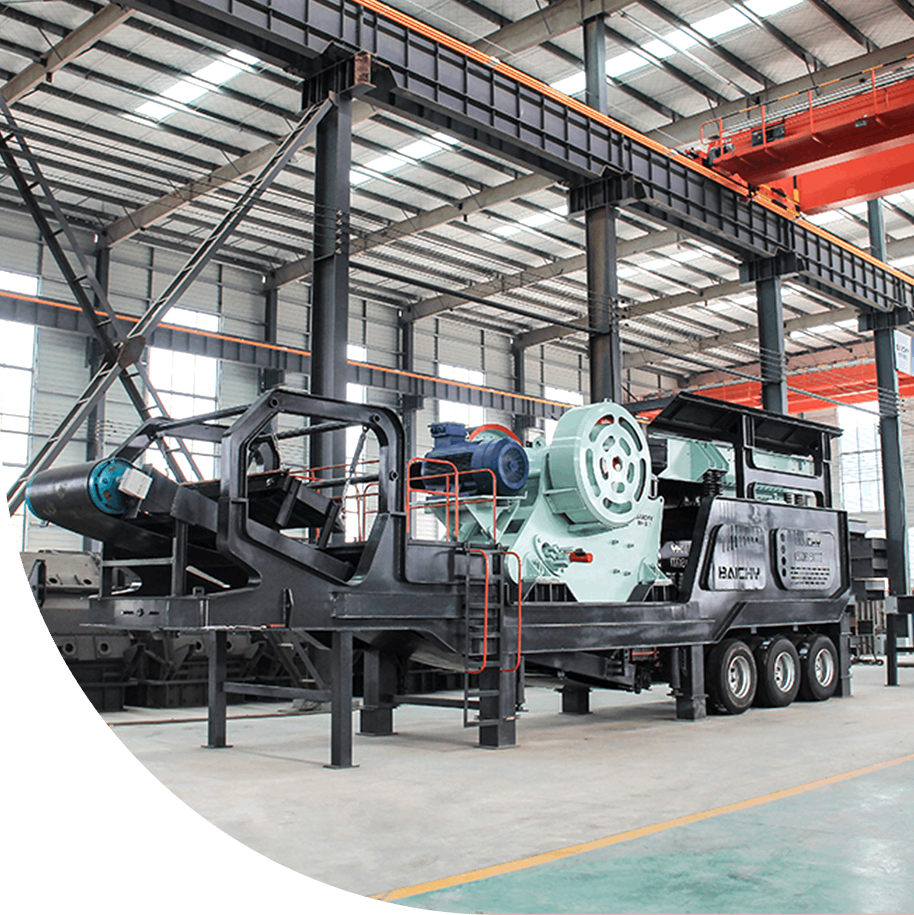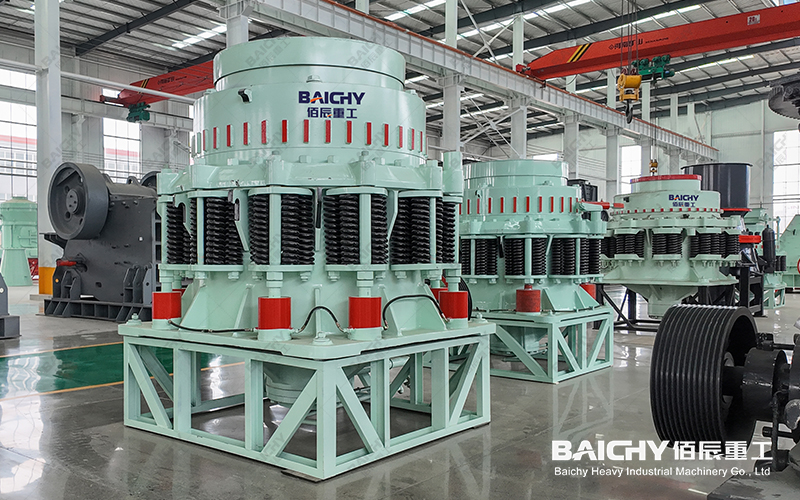
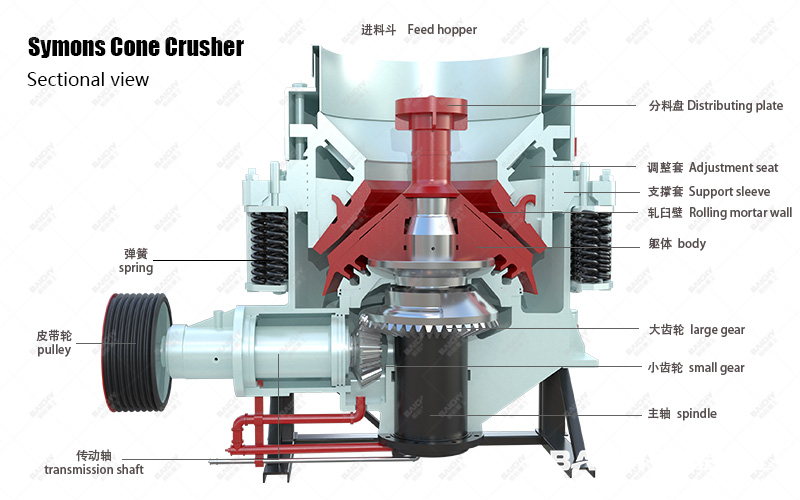
Symons Cone Crusher
Symons cone crushers are essential equipment for crushing medium-hard materials. Their high performance comes at the cost of wear and tear on core wear parts (such as the moving cone liner, fixed cone liner, bowl shell, and eccentric bushing). A well-planned and well-executed wear part replacement is not only crucial for restoring equipment performance but also crucial for avoiding unplanned downtime and ensuring production efficiency.
This article aims to provide a detailed guide to replacing wear parts on Symons cone crushers, helping your team complete this important task safely and efficiently.

Symons Cone Crusher PDF,Download ↓↓↓
1. Before Replacement: Thorough Preparation
As the saying goes, "sharpening the knife makes the chopping of wood easier." Thorough preparation is half the battle.
1. Safety First, Isolate Energy: This is the most important step! Always perform the "tagout and lockout" procedure to completely disconnect the crusher's main and control power supplies and ensure the hydraulic system is fully depressurized.
2. Spare Parts and Tool Inventory: Ensure all new wear parts (liners, seals, bolts, etc.) are of the correct type and quality. Gather all necessary tools, including but not limited to: lifting equipment (crane/hoist), hydraulic nut tensioner, torque wrench, jack, wire rope, and personal protective equipment (hardhat, gloves, goggles).
3. Site Cleanup and Planning: Clear debris around the equipment, ensure a clean and well-lit work area, and designate a safe storage area for removed and new parts.
II. Core Steps: Standardized Replacement Procedures
Following the correct disassembly and installation sequence is crucial.
1. Removing the Old Liner:
◦ Upper Removal: First remove the upper components, such as the feed hopper and feed tray.
◦ Lifting Out the Cone Assembly: Using a crane, carefully lift out the entire cone assembly (locking nut, adjusting ring, and cone liner). Maintain good balance and avoid bumps.
◦ Exposing the Moving Cone Assembly: After removing the cone, the moving cone assembly (main shaft, moving cone, and moving cone liner) becomes exposed.
◦ Liner Removal: Use specialized tools or heating (careful operation) to loosen the zinc alloy (or resin) securing the liner, then hoist out the old liner. Important: Do not directly remove it with gas cutting to avoid damaging the cone body.
2. Cleaning and Inspection:
◦ Thoroughly clean any old zinc slag, rust, and debris from mating surfaces such as the cone and adjusting ring.
◦ Carefully inspect non-wearing parts such as the spindle, cone, and eccentric sleeve for cracks, wear, or scratches. Damage to any of the base components may cause premature failure of the new liner.
3. Installing the New Liner:
◦ Positioning and Alignment: Hoist the new moving and fixed cone liners onto the cone and adjusting ring, respectively, ensuring accurate positioning.
◦ Pouring the Zinc Alloy: This is a critical step. Ensure a uniform gap between the liner and the base, and then pour the new zinc alloy. The pouring process must be continuous and rapid, and air must be removed to ensure a full fill.
◦ Installing Seals: Replace all O-rings and seals to prevent oil leakage.
4. Reinstallation and Adjustment:
◦ Reinstall the movable and fixed cone assemblies in the reverse order of disassembly.
◦ Use a hydraulic tensioner to tighten the locknuts to the specified torque.
◦ Initially adjust the discharge opening size to allow for adjustment margin for the subsequent no-load test run.
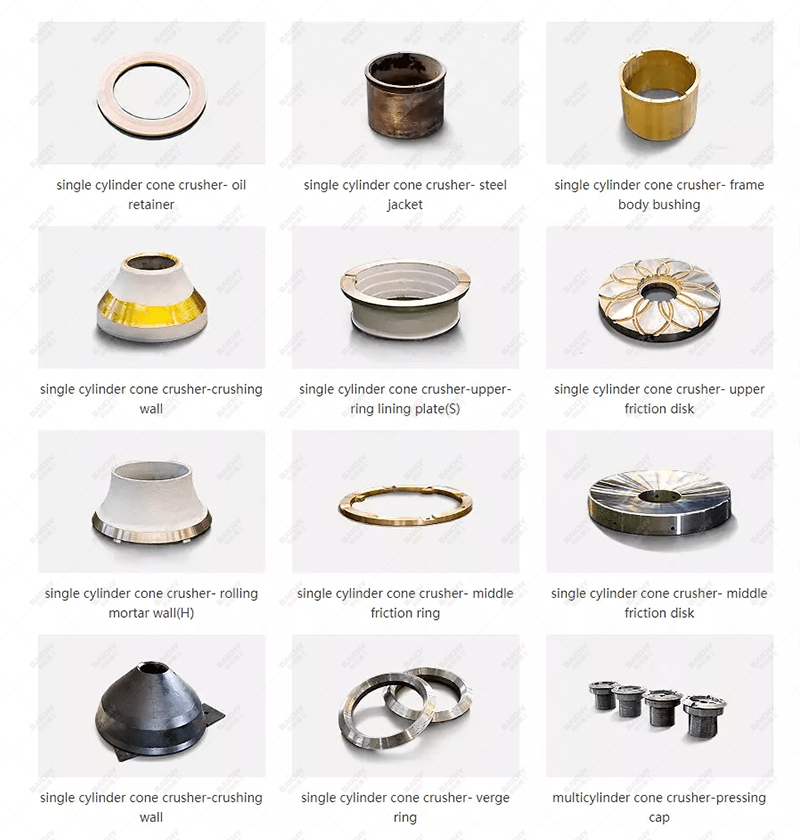
Symons Cone Crusher Wear Parts — Image Gallery
III. Post-Replacement: Rigorous Commissioning and Acceptance
Replacement work doesn't end with tightening the screws.
1. No-Load Test Run: After confirming that all components are correctly installed, perform a brief (approximately 1-2 hours) no-load run. Closely monitor the motor current, sound, and vibration, as well as the oil pressure and temperature of the lubrication system.
2. Load Test Run and Final Adjustment: After the no-load state is normal, begin a loaded test run with a small amount of material. Fine-tune the discharge opening to the ideal size based on the discharge particle size and equipment operating conditions. Observe for a period of time to ensure smooth operation.
IV. Key Considerations and Professional Advice
• Safety First: No one is allowed to stand beneath the liner during lifting operations. All steps must be performed under the guidance of an experienced technician.
• Paired Replacement Principle: It is strongly recommended to replace both the moving and fixed cone liners in pairs. Replacing only one of the two will result in poor fit between the new and old liners, accelerated wear, and reduced overall efficiency.
• Torque is Key: All critical bolts (such as locknuts and mainframe bolts) must be tightened to the manufacturer's specified torque using a torque wrench and regularly reviewed.
• Establish a Maintenance File: Recording information such as the date of each replacement, the batch of wear parts, and operating hours will help analyze wear patterns and optimize future replacement plans and spare parts inventory.
A professional Symons cone crusher wear part replacement is a systematic process that integrates planning, technology, experience, and safety. By following this guide, you can not only effectively restore peak equipment performance but also significantly extend the life of your crusher, ensuring stable production.
About of Baichy Heavy Industry
Baichy Heavy Industry is a high-tech mining equipment company integrating R&D, manufacturing, sales, and after-sales service. Focusing on crushing, grinding, and mineral processing equipment, we provide professional solutions to our customers. We are ISO9001:2015 、certified, and our products include mobile crushing palnts, crawler crushing plant, construction waste crushing plants, jaw crushers, sand making machines, cone crushers, fine crushers, grinding mills, ball mills, etc., all with reliable performance to meet diverse project needs.
Our advantages:
• Professional pre-sales support: Free project design and comprehensive solutions to help you accurately select the right equipment;
• Comprehensive on-site service: Providing installation guidance and worker training to ensure smooth equipment commissioning;
• Reliable after-sales guarantee: A complete after-sales system, timely response to technical inquiries and equipment maintenance, ensuring long-term stable operation.
To protect your rights, please contact us through the following official channels for professional service:
Official Website Customer Service
https://wa.me/+8615093222637
Email: [email protected]
We are committed to providing high-quality equipment and full-cycle services to deliver comprehensive intelligent solutions for the global mining industry!
Frequently Asked Questions:
1. Why is it strictly emphasized that Symons crusher liners must be replaced "in pairs"?
A: Replacing liners in pairs—specifically the moving cone liner and the fixed cone liner—is absolutely critical. New and old liners exhibit different wear patterns and profiles; mixing them results in uneven mating clearances. This leads to localized overloading and accelerated wear, which not only shortens the lifespan of the new liner but also reduces crushing efficiency, causes inconsistent product particle size, and may even generate abnormal noises and vibrations. In the long run, this ultimately increases total operating costs and safety risks.
2. What precautions must be taken during the zinc alloy pouring process? Why is water cooling strictly prohibited?
A: This is the core process that determines the success or failure of the installation. There are three key points:
① Thorough Cleaning and Preheating: The mating surfaces must be free of rust and oil, and the cone body must be preheated to 60–80°C (as specified in the manual) to prevent the molten zinc from solidifying too rapidly upon contact.
② Continuous and Rapid Pouring: The pouring must be completed in a single, continuous operation to ensure a full fill with no air pockets.
③ Strict Prohibition of Water Cooling: After pouring, the assembly must be allowed to cool naturally. Rapid quenching with water induces internal shrinkage stresses and micro-cracks within the zinc alloy; this drastically reduces its bonding strength, creating a risk that the entire liner could detach during heavy-load operation, potentially causing a severe equipment failure.
3. Once the replacement is complete, what key parameters should be monitored during the loaded trial run?
A: The loaded trial run serves as the final acceptance stage and requires comprehensive system monitoring:
① Operating Parameters: Verify that the motor current remains stable and does not exceed the rated value; check that the oil pressure and temperature within the lubrication system are within normal ranges.
② Equipment Status: Listen for any abnormal metallic impact sounds; measure the vibration levels at the bearing housing to ensure they remain within the permissible limits (e.g., ≤ 4 mm/s).
③ Process Performance: Collect samples to verify that the discharge particle size meets production specifications.
Of particular importance: after 24 hours of loaded operation, all critical bolts (especially the locking nuts) must be re-tightened while the machine is still hot to eliminate any loosening caused by thermal expansion.